Date: 30th & 31st July 2015 Start/Finish: Jubilee Bridge, Eskdale Wainwrights: Scafell Pike, Lingmell, Scafell, Slight Side Height Gained: 4551 feet Distance: 13.8 Miles
The Route: anticlockwise form Jubilee Bridge (bottom right)
Wandering around upper Eskdale is a humbling experience. This area, more than any other in the Lake District has a feeling of true wilderness, making you feel small and insignificant amongst the giants of the Cumbrian fells.
Adding to the sense of isolation is the fact that this is also one of the least visited areas of Lakeland. I only saw one small group of people from a distance in 4 hours of wandering around the Eskdale valley which was in stark contrast to when finally emerging from little narrowcove onto the main ridge to Scafell Pike summit. Talk about one extreme to the other!
The lower Eskdale valley
Bowfell standing guard at the head of the valley
The River Esk
Lingcove Bridge
From here the route crosses the old Lingcove packhorse bridge before climbing up beside the Esk waterfalls and emerging into upper Eskdale and the vast basin of Great Moss.
Nearing the top of the Esk waterfalls and Scafell Pike comes into view for the first time
Scafell Pike and Ill Crag
The upper section of the River Esk guarded by the crags of Scar Lathing
There are paths to the left and right of Scar Lathing into Great Moss but taking the left path brings you up close and personal to the huge crags of Scafell.
The crags of Scafell
Great Moss with Scafell Pike, Ill Crag and Esk Hause at the head of the valley
Great Moss is a hazardous place as your gaze is constantly drawn upwards to the majestic scenery rather than watching where you are treading! A twisted ankle awaits the unwary as the terrain is a large flat peaty area criss-crossed with many little streams. Getting through with dry feet is a challenge in itself.
Cam Spout Gully leading up to Scafell
Dow Crag
Looking back over Great Moss
There are route choices to get up onto Scafell PIke from Great Moss. 1) Camspout gully (but I have done that route before to get to Scafell) 2) Up to Esk Hause and then along the main ridge (done that route too but from Bowfell) or 3) via the steep gully of Little Narrowcove (which I haven't been up before). That settled, I headed up the gully which follows the course of a tumbling gill eventually emerging onto the main ridge leading to Scafell Pike summit. This is where I joined the hoards of other folk all wearily plodding the last few hundred feet up onto England's highest ground.
At the bottom of Little Narrowcove ...
... and the top
Looking back down the Little Narrowcove gully over Pen
First view of Lingmell & Great Gable from the main ridge
Broad Crag and Ill Crag
Scafell Pike summit
A video of the summit view from Scafell Pike with all the main fells in view labelled
Scafell (where I camped later on) from Scafell Pike
Following the path down to Lingmell ...
... and then up to Lingmell
Lingmell summit with the Scafells behind
Broad Crag & Scafell Pike
Looking over Piers Gill towards Great End
Taking the path towards Mickledore
Scafell Pike from near Lords Rake
So what can I say about Lords Rake. It's steep. It's hard work. It's an exhilarating way up onto Scafell as it traverses its most impressive rock scenery. If you have a spare 5 minutes you can watch this abridged video of me struggling up it. NB. The famous chockstone at the top of the rake finally collapsed on 31st July 2016. May it rest in 'pieces'.
Looking up Lords Rake
Looking back from the top of the 2nd Col on Lords Rake
Scafell summit views North ...
... and west over Wast Water
Looking back to Scafell Pike from Scafell
Tonight's luxurious accommodation
Drying socks out
It was a comfortable camp until the rain came in the early hours (which wasn't forecast!). While the tarp sheltered me from most of the wind driven stuff I had to seek refuge within the bivvy to keep dry. By morning there no sign of it letting up so I begrudgingly packed up in the rain and trudged back up to the summit before heading down the Slight Side ridge and back to Eskdale. It rained for most of the way. The visibility was about 100 yards. My trail shoes made a surprising variety of different squelching sounds to keep me entertained on the long descent.
Slight Side summit in the clag
Getting back below the cloud base
Nearly back to the road
Below is a 10 minute video highlighting the best bits of the walk, and the process of making camp on Scafell summit.
Kit List Shelter : Backpackinglight solo tarp (278g) & Integral Designs solo ground sheet (140g) Mat : Exped SynMat7 UL LW (595g) Sleeping Bag : Sleeping quilt actually, the As Tucas custom down quilt (519 grams) Stove : High Gear Blaze titanium stove (48g) + Primus 100g Gas Cart
Pans : Evernew Solo-set (250g)
Rucksack : Osprey Talon 44 (1.18kg) Fluid : Deuter Streamer 2lt Bladder (185g) and 600ml Sigg bottle (100g empty) + Sawyer Squeeze filter (84g). Food : Fuizion Beef Stew, Buttered Bread, Supernoodles,various sugary snacks.
Bits & Bobs :
headtorch and spare batteries, Iphone + Anker 5800mHh battery, victorinox knife, map & compass, basic first aid kit and
Petzl e-lite, spork, various fold dry bags, flint & steel, plastic
trowel. Camera : Panasonic DMC-LX7 & lowepro case. Go-Pro Hero 4 Silver and spare batteries.
Clothes : Ron Hill wicking T-Shirt, Rab 100 wt fleece (250g), True Mountain Ultralight windproof jacket (100g), TNF Meridian
Cargo Shorts (190g), ME beany, TNF E-Tip gloves, sunglasses,
Buff, Innov8 short socks. PHD wafer down jacket (about 200g). Trail Shoes : Solomon Speedcross (310g) Total weight excluding water = 8kg
I've really taken a liking to the tarp and bivvy set-up recently. The weight saving is obviously attractive but I'm finding I really like the exposure. The simplicity of just gazing up at a star studded night sky, watching passing satellites and occasional meteors until drifting off to sleep is a truly magical experience. Of course this is all well and good if the sky is clear and the weather is calm and dry. Any suggestion of a dodgy forecast and I will take the tent or the trailstar. Anyway, in anticipation of some nice balmy summer nights I have been trying a few different tarp configurations in the back garden. Here they are :-
I have used the 2 'lean-to' configurations a few times now and they work well but with both set-ups there is a large area of unsupported silnylon which has a tendency to sag as it collects condensation. Using the 2 lifter points solves this problem and so the last time I camped out I looked for suitable sticks along the walk, but as is perhaps typical when hiking in the high fells, I didn't come across anything suitable. A fellow 'twitterer' had previously suggested taking 2 bamboo canes as they are light & fairly strong. So I recently spent an hour in the garden fiddling with my 3 favourite tarp configurations but with the addition of two 3 foot bamboo canes as lifters. These 3 short videos are the result and although I've yet to test these 'pimped up' tarp set-ups in the fells I reckon they should do the job nicely.
The tarp can be pitched in a whole variety of different ways to suit the conditions and using hiking poles, trees, sticks, boulders etc as anchor points for the guy lines. The 'A-Frame' set-up seems popular with many folk but that blocks my view of the sky and doesn't provide much wind protection from the side. As I do most of my camping in the high fells, it is wind resistance that is of most importance to me and the 3 configurations above provide adequate shelter, with the 'flying V' being the most sturdy.
The tarp is the 'solo tarp' from backpackinglight.co.uk It is 9 foot x 5 foot silnylon, weighs 278 grams and has lots of attachment loops around the perimeter (16 in total) plus the 2 lifter points. Here are a few videos of the bivvy (and tarp in 2 of them) set up in the Lake District mountains.
I have new Gear !! First look at the As Tucas Down Quilt The inherent design flaw with down sleeping bags is that all the insulation underneath you is compressed by your body weight to a degree
where it loses all thermal efficiency. This squashed down is essentially dead weight. The idea behind a quilt is to
eliminate this dead weight and instead use the insulating properties of the mat to protect you from the cold ground.
As Tucas Down Quilt bottom ....
... and top
This idea
was popularised by legendary America backpacker Ray Jardine and has
since become become very popular, particularly within the lightweight
backpacking community in the States.
This short video from 'standing bear' explains the concept a little better than I can.
Personally I've never really got on with mummy sleeping bags. Not so much for the reasons above but more because I'm a fidgety sleeper. I tend to roll over a lot, throw arms and legs out all over the place and generally not stay in one position for long. As such, I'm forever twisting and turning; trying to move the zip, that was in the perfect position 10 minutes ago, out from underneath me. Or I'm straining the fabric trying to stretch out a knee or an elbow. I'm very envious of those lucky folk who can sleep on their backs without moving from dusk til dawn.
Quilts are therefore an attractive proposition to me, and after doing a bit a reading around the subject, I bit the bullet and ordered a custom down quilt from Marco at As Tucas. It arrived a few days ago and I thought it would be worth posting a few pics, a few stats and a few thoughts.
As Tucas offer an increasing number of ultralight outdoor products but they also offer a custom made service. I therefore emailed Marco with my quilt requirements; namely that I like a bit of wriggle room, that I'm 5' 10" and I would like it keep me warm down to about freezing point. He suggested a custom made sestrels quilt with 350g down in size medium length and regular width. The sestrels quilt in its usual form is synthetic and the details can be found here. I understand that Marco will be selling the 'Foratata' down quilt from July 15th, which is almost identical to this one. On initial inspection the quality of workmanship is superb. There really isn't a stitch out of place. The quilt is simplicity itself with a roomy enclosed foot box and a open back which can be closed up by fastening 2 press studs.
This particular quilt uses 350g of pure white 900 cuin down sourced from Poland. It has an estimated comfort rating of 0 degrees C. The fabric is Schoeller 12 denier which is 28g/m2. It is windproof and breathable. It has an 'ecorepel' coating which provides resistance against water and dirt. Full details can be found here. Marco tells me that the internal baffles are made from cuben fibre and their height is 25mm.They are sized so that the down is slightly compressed within the chambers. This allows for better control of down movement without a loss of thermal efficiency.
The down lofts really well
On my scales the quilt weighs 519 grams. It packs down to 30cm x 15cm x 15cm .
This 10 litre dry bag weighs 43 grams.
As Tucas design their quilts to be a bit wider and longer than the typical equivalent from American makers. This is so the quilt can be pulled up over your neck and head when the temperature drops without necessarily having to use a hat or balaclava. Also, it is not adorned with complex fastenings to secure it to a mat. You simply use it like you would a normal quilt at home and tuck it under your sides as needed in order to keep out the droughts. It certainly seems very comfy on my lounge floor with plenty of room to cover my head.
Plenty of room
There is also the option of putting the mat inside the quilt. This is not something I can imagine doing but a few people have asked if it is possible and the answer is 'yes'. With the thermarest and me inside its a bit of squeeze with the poppers fastened and is essentially a wide mummy bag in this configuration. There is adequate room with the poppers unfastened though, and the quilt just tucked under mat. However, I don't like this idea and I will be using it on top of the mat and tucking the quilt underneath me as it is designed to do.
With full length Thermarest inside
Room for a thermarest prolite plus regular if you want to tuck the quilt in underneath the mat.
The one thing I'm not sure of is what to wear whilst in it? In a sleeping bag I usually use a liner bag to protect the down from my general sweat and grime but of course that would kind of defeat the object of using a quilt. I think perhaps a very lightweight base layer top and bottoms will do the job. Perhaps something like these from Rohan. Any other suggestions welcome :-) I intend to use the quilt for 3 season use in the Cumbrian mountains, the first trip being described here - 'first night in the as tucas down quilt'. I will post an update as to its performance in the field later in the year.
I should also make it clear that I have no affiliation with As Tucas or Marco personally and I paid for this quilt with my own hard earned dosh.
Date : 17th & 18th April 2015 Start/Finish : Jubilee Bridge, Brotherikeld, Eskdale. Wainwrights : Green Crag, Harter Fell, Hard Knott Distance : 13.3 miles Height Gained : 3455 feet Social Hiking Interactive Map :Click Here
The route: Anti-clockwise from the cross-hairs
I knew this was going to be a great little trip. The omens were good as I drove over the Wrynose and Hardknott passes without even seeing another car. One of life's little pleasures. So I set off from near Jubilee Bridge heading for Green Crag. Perusing the map, the Birker Force waterfall looked like it might worth a detour and there did seem to be a vague path of sorts which climbed up along it. I soon found the waterfalls and the path which was indeed vague and required the use of hands and feet at some points.
Penny Hill Farm ... complete with spring lamb and mum
Old Lower Birker Farm ... being renovated into a rather nice pad
Quintessential Lake District - A moss covered dry stone wall
Views towards Scafell
Birker Force
Views from the top of Birker Force
From the top of the falls it's an easy ramble along boggy ground towards the crags. There are many crags around this area, with Green Crag being the highest and so I decided to visit a few of them along the way.
Low Birker Tarn
Crook Crags (left) and Green Crag (right)
Views over the Eskdale valley from Crook Crags
Green Crag from Pike Crag
Green Crag summit view back towards Eskdale and Harter Fell
From Green Crag I headed for Harter Fell but took a minor detour over Dow Crag (no not the Coniston one - that would be a detour!). The ground is really wet in places around here. I had, until now, managed to keep my trail shoes dry ... but no longer. I finally succumbed to wet feet.
Next stop ... Harter Fell
The lovely Eskdale valley from Dow Crag
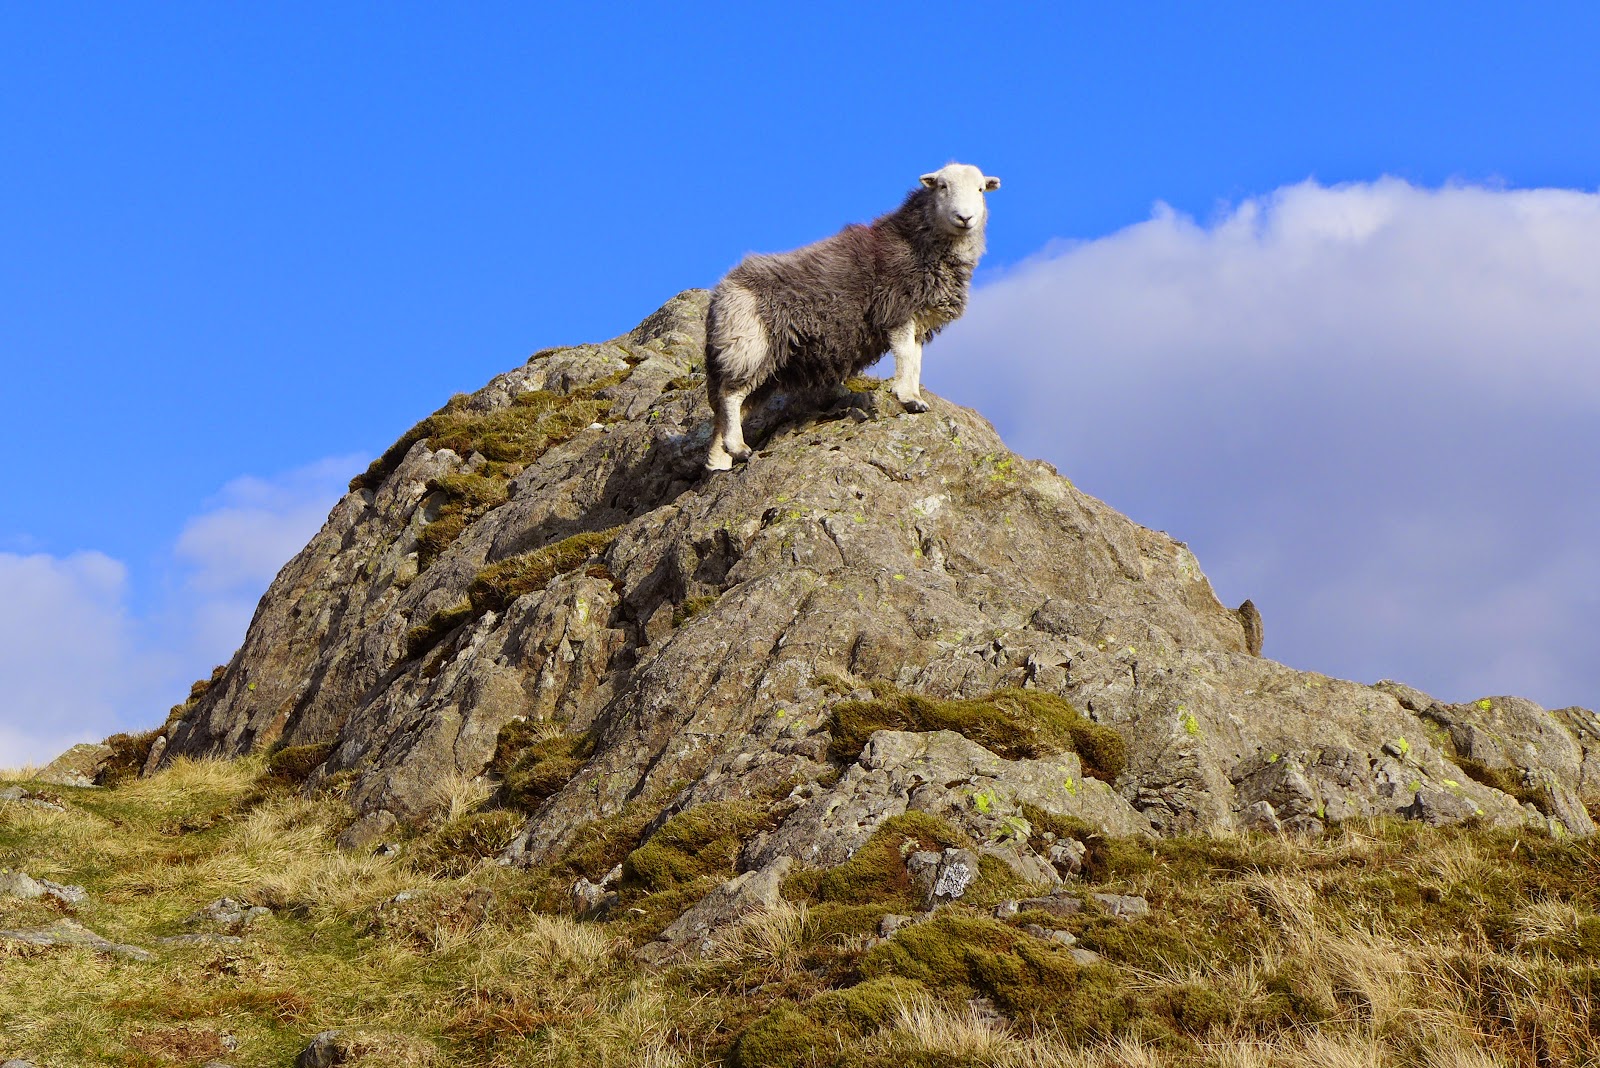
A local on Harter Fell
Harter Fell summit
From Harter Fell I made a bee line for Hard Knott just pausing to collect water from Hardknott Gill along the way. The wind was quite a bit stronger than the insignificant wafts that were forecast so I looked for a sheltered spot and managed to find one with good views of both the sunset and the Scafells. Like I said, the omens were good for this trip :-)
Hard Knott from Harter Fell
Pitched up on Hard Knott with views of the Scafells
The eagle eyed among you will note the deliberate mistake that I have pitched the tarp 'inside out'. This is because I wasn't using the 2 lifter points in the middle of the tarp (I forgot to bring 2 short bamboo canes for this) and so instead used them on the inside to attach my little tent light. The rudimentary tarp pitching video
A nice view of the sunset
It was a cold clear night. I spent a long time just watching the night sky which was pitch black and bursting with stars. I watched the space station pass over, saw many satellites and a few shooting stars. It was a mesmerising scene from the comfort of my sleeping bag. This is the great selling point for tarps but of course, being a certified wimp, had there been a hint of rain forecast or indeed any other such inclement weather then I would have brought the tent or the trailstar instead. Tonight though, it was perfect for a 'roofless' night under the stars. I forgot the bivvy bag (schoolboy error!) and so needed to wear my down jacket and insulated trousers to stay warm as the temperature got down to just below zero. Apart from a bit of wind (the weather that is, not the effects of my delicious Fuzion chicken tikka masala) it was a quiet night. I woke to frosty surroundings and a crispy tarp. I was up and away by 6am and onto Hard Knott summit to watch the sun rising over Cold Pike. All along the ridge towards Lingcove Beck are stunning views of upper Eskdale and the Scafells. It was a joy to watch the sun first touch Scafell summit and then move its way slowly down to illuminate the whole huge massif in an orange glow. My futile efforts with the camera really didn't do justice to this majestic scene.
Sunrise over Cold Pike from Hard Knott summit
Hard Knott summit view back to Harter Fell ...
... and over to the Scafells
Scafell and Scafell Pike
At the end of the Hard Knott ridge I followed the path down along the gorges and waterfalls of Lingcove Beck.
It always amazes me how the old Lingcove packhorse bridge stays up. I have no
idea when it was built and a quick google search was unrewarding but it
looks like it has seen a good few decades and will likely see many more.
Lingcove Bridge
... defying gravity
From here its a lovely quiet walk following the course of the River Esk back to Jubilee bridge. Only here did I see another person since leaving the car the day before.
Back to the road and the start of the Hardknott Pass
Kit List Shelter : Backpackinglight solo tarp (278g) & Integral Designs solo ground sheet (140g) Mat : Exped SynMat7 UL LW (595g) Sleeping Bag : Rab Alpine 400 (970g) and Rab silk liner (132g)
Stove : High Gear Blaze titanium stove (48g) + Primus 100g Gas Cart
Pans : Evernew Solo-set (250g)
Rucksack : Osprey Talon 44 (1.18kg) Fluid : Deuter Streamer 2lt Bladder (185g) and 600ml Sigg bottle (100g empty) + Sawyer Squeeze filter (84g), 100 mls milk, coffee
Food : Fuizion Chicken Tikka Masala & Rice, Buttered Bread, Supernoodles,various sugary snacks.
Bits & Bobs :
headtorch and spare batteries, Iphone + Anker 5800mHh battery, victorinox knife, map & compass, basic first aid kit and
Petzl e-lite, spork, various fold dry bags, flint & steel, plastic
trowel. Camera : Panasonic DMC-LX7 & lowepro case.
Clothes : Ron Hill wicking T-Shirt, Rab 100 wt fleece (250g), Montane lightspeed jacket (160g), TNF Meridian
Cargo Shorts (190g), ME beany, Rab phantom grip gloves, sunglasses,
Buff, Innov8 short socks. PHD wafer down jacket (about 200g). Montane Prism insulated pants (295g). Trail Shoes : Merrell Moab Ventilator (680g pair)


